
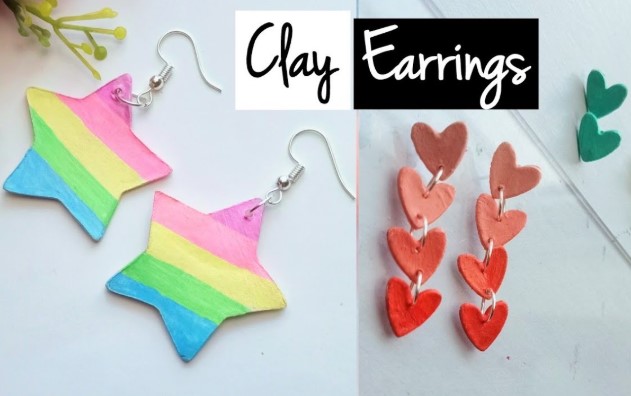
Clay earrings bring a playful and personal touch to any outfit. These lightweight, customizable accessories allow jewelry lovers to showcase their style in unique ways. Crafting your own clay earrings gives complete freedom over shapes, colors, and patterns, making every piece truly one-of-a-kind.
Artists and beginners alike can enjoy the tactile experience of molding clay, blending shades, and experimenting with textures. Simple tools like a rolling pin, cookie cutters, and a baking sheet transform basic clay into wearable art.
Small details, such as layering colors or adding tiny embellishments, elevate the design and make the earrings stand out. Handmade earrings make thoughtful gifts and offer an affordable way to build a signature jewelry collection.
This guide walks through the essentials of shaping, baking, and finishing clay earrings, helping crafters of all skill levels produce professional-looking results without expensive materials or complicated techniques.
How to Make Clay Earrings?
Clay earrings give a personal and stylish touch to your outfit. They allow you to wear unique colors, shapes, and patterns that no store can offer. Making clay earrings at home saves money and gives a creative experience.
Clay is soft, easy to shape, and comes in many colors. You can make small, simple designs or larger, detailed ones. Even beginners can make professional-looking earrings with practice. This guide explains every step clearly and in detail.
Materials Needed
-
Polymer clay: Soft, colorful clay that hardens in the oven.
-
Earring hooks or posts: Choose metal that does not cause allergies.
-
Rolling pin or smooth bottle: To flatten clay evenly.
-
Clay knife or craft blade: For cutting shapes.
-
Toothpick, needle, or skewer: To make holes or add patterns.
-
Oven: For baking polymer clay.
-
Parchment paper or silicone mat: To prevent sticking while baking.
-
Sandpaper or nail file: Smooth edges and surfaces after baking.
-
Gloss, varnish, or acrylic sealer: Optional, for shine and durability.
Step-by-Step Guide to Make Clay Earrings
Step 1: Prepare Your Clay
-
Wash your hands and clean the workspace to prevent dust or dirt on your earrings.
-
Cut a small amount of clay for each earring. Start with pieces about the size of a marble.
-
Knead the clay thoroughly. Press, fold, and roll it in your hands until soft and flexible. Soft clay shapes better and avoids cracks.
Step 2: Shape the Clay
-
Flatten clay using a rolling pin. Keep thickness even, around 2–3 mm. Too thin clay breaks easily; too thick clay may bake unevenly.
-
Use a knife, cookie cutter, or freehand to cut shapes. Circles, hearts, triangles, or abstract shapes work well. Experiment with shapes to see what looks good.
Step 3: Add Colors and Patterns
-
Mix colors by gently rolling two pieces together. Do not overmix if you want a marbled effect.
-
Use a toothpick or skewer to draw patterns, lines, or dots.
-
Press textures lightly. You can use stamps, leaves, or fabrics for unique designs.
Step 4: Make Holes for Hooks
-
Make a small hole near the top of each shape using a toothpick or needle.
-
Ensure the hole is big enough for the earring hook or jump ring.
-
Double-check the hole location. Holes too close to the edge may break.
Step 5: Bake the Clay
-
Preheat oven according to clay instructions (usually 265–275°F / 130°C).
-
Place clay shapes on parchment paper or silicone mat.
-
Bake for 15–30 minutes depending on thickness. Check instructions carefully. Avoid over-baking; clay can burn or darken.
-
Let clay cool completely before touching. Cooling prevents warping.
Step 6: Smooth and Finish
-
Use fine sandpaper or a nail file to smooth edges and surfaces.
-
Apply a thin layer of gloss or varnish to add shine and protect the earrings.
-
Let varnish dry completely. This step is optional but improves durability.
Step 7: Attach Earring Hooks
-
Insert earring hooks or posts through the holes.
-
Ensure hooks are secure and do not fall out.
-
Test earrings by gently tugging to make sure they are safe to wear.
Extra Tips and Ideas
-
Start Small: Small earrings are easier to handle and less likely to break.
-
Avoid Cracks: Knead clay thoroughly and avoid creating thick edges.
-
Storage: Keep leftover clay in an airtight bag. It stays soft and ready for future use.
-
Experiment: Try mixing textures, colors, and shapes for unique designs.
-
Gift Ideas: Handmade clay earrings make great gifts. You can match colors to the person’s favorite style.
-
Safety: Use a well-ventilated area for baking. Do not use clay meant for kids in the oven; some are not heat-safe.
Advanced Tips
-
Layering Clay: Stack thin layers of different colors to create striped or patterned earrings.
-
Incorporating Other Materials: Small beads, tiny charms, or metallic foils can add a professional touch.
-
Polishing: After baking and sanding, buff earrings with a soft cloth for extra shine.
-
Storage for Finished Earrings: Keep in a small box or pouch to avoid dust and scratches.
FAQs
1. Can I use air-dry clay instead of polymer clay?
Yes, but air-dry clay is softer and more fragile. Handle gently and avoid water exposure.
2. How long does baking take?
Thin pieces bake in 15 minutes, thick pieces up to 30 minutes. Follow the clay package guide.
3. Can I reuse leftover clay?
Yes, store it in an airtight bag to keep it soft for future use.
4. How can I avoid cracks or breaks?
Knead clay thoroughly, make even thickness, and avoid holes too close to edges.
5. Can I paint clay earrings after baking?
Yes, use acrylic paint and seal with varnish to protect the color.
Conclusion
Making clay earrings gives freedom to design unique, personal jewelry. Following each step carefully ensures beautiful results. Experiment with colors, textures, and shapes to make every pair special.
Clay earrings last long if baked, finished, and handled properly. This creative activity can be relaxing, fun, and a source of pride.