
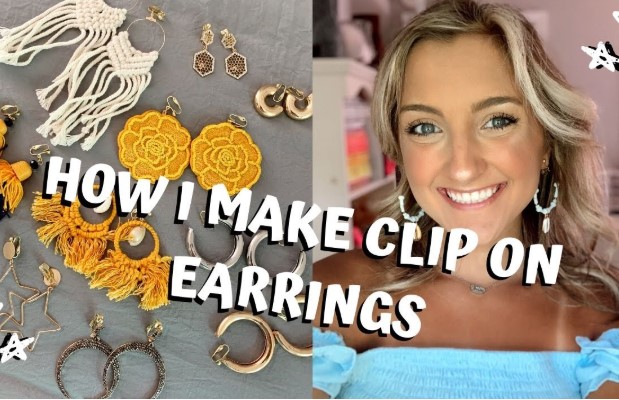
Clip-on earrings offer style without the commitment of pierced ears. They bring elegance, fun, and versatility to any outfit while remaining comfortable for long wear. Making your own clip-on earrings at home opens a world of creativity and personalization.
You can select colors, materials, and designs that reflect your personality, ensuring every piece feels unique. Crafting earrings also provides a rewarding hands-on experience, allowing you to explore jewelry techniques and develop new skills.
Materials like beads, charms, and small pendants can turn simple clips into dazzling accessories. The process does not require professional tools or extensive experience, making it perfect for beginners and seasoned crafters alike.
With a few basic supplies and some patience, turning ordinary components into stylish, wearable art becomes an enjoyable project. Personalized clip-on earrings also make thoughtful gifts, adding a personal touch that store-bought items cannot match.
How to Make Clip on Earrings?
Clip-on earrings offer style without the need for pierced ears. They can be casual or fancy. Making them at home allows full control over designs, colors, and materials. This guide explains everything step by step.
Materials Needed
Collect all materials before starting. Good quality materials make earrings last longer.
-
Clip-on earring bases – Metal or plastic bases. Some have flat pads, others have small loops for hanging charms.
-
Beads, charms, rhinestones, or cabochons – Choose according to your preferred style.
-
Jewelry glue – Clear-drying, strong glue like E6000. Avoid craft glue for heavy pieces.
-
Jewelry pliers – Round-nose pliers for loops, flat-nose pliers for bending wires, and wire cutters.
-
Headpins or eyepins – For stringing beads and creating dangles.
-
Wire – 20–24 gauge works best for small designs.
-
Sandpaper or nail file – Smooth rough edges or surfaces.
-
Tweezers – Handle tiny beads or stones with ease.
Extra materials (optional): small chains, tassels, clay, or polymer clay for unique designs.
Step-by-Step Guide to Making Clip-On Earrings
Step 1: Choose Your Base
Pick a base that suits your design. Flat bases work well for glued decorations like stones or clay. Loop bases allow dangling charms or beads. Clean the surface with a cloth to remove oils and dust.
Step 2: Plan Your Design
Sketch the design on paper. Decide which beads, charms, or decorations go where. Arrange all elements on a flat surface to visualize the final look.
Step 3: Prepare Decorations
If using beads, thread them onto headpins. Make loops at the ends using round-nose pliers. For flat decorations like stones, check the size fits your base.
Step 4: Attach Decorations to the Base
-
For flat glue-on decorations: Apply a small dot of jewelry glue on the base. Place the decoration carefully. Press gently for a few seconds. Avoid too much glue to prevent overflow.
-
For hanging decorations: Open the small loop on the clip base using pliers. Attach the bead dangle or charm. Close the loop securely.
Step 5: Secure Loose Ends
Check all decorations are firmly attached. Sand any rough edges on stones or clay to prevent scratches. Let the earrings dry completely. Most jewelry glue requires 24 hours to reach full strength.
Step 6: Test the Clip
Before wearing, gently press the clip to check tension. Adjust with pliers if it is too tight or too loose. Proper tension keeps earrings comfortable and prevents slipping.
Tips for Making Durable Clip-On Earrings
-
Choose lightweight beads to avoid ear discomfort.
-
Use hypoallergenic metal bases for sensitive skin.
-
Avoid water contact for glued designs unless glue is waterproof.
-
Store earrings separately in a soft pouch or jewelry box to prevent scratches.
-
Mix materials like resin, beads, and small charms for a unique look.
Creative Design Ideas
Beaded Drop Earrings
Thread small beads on a headpin. Create a loop at the top. Hang from a clip base with a loop. Makes a stylish dangling look.
Floral Earrings
Use polymer clay to make small flowers. Press gently on a flat clip base with glue. Add a tiny rhinestone in the center for sparkle.
Geometric Earrings
Cut small wooden or acrylic shapes. Glue on a flat clip base. Combine triangles, circles, and squares for modern designs.
Personalized Earrings
Use letter beads or small charms with initials. Make them into small dangles. Attach to loop clip bases for a personal touch.
Advanced Techniques
-
Wire Wrapping: Secure beads with thin wire to create artistic dangles.
-
Resin Coating: Pour a thin layer of resin over clay or stones for shine and protection.
-
Layering Materials: Combine beads, fabric, and charms to create multi-layer earrings.
Safety Tips
-
Avoid very sharp edges on charms or wires.
-
Test glue in a small area before applying to decorations.
-
Work on a protected surface to avoid damage from glue or paint.
-
Keep small beads out of reach of children to prevent choking hazards.
Final Thoughts
Making clip-on earrings combines creativity, style, and fun. Beginners and experienced crafters can enjoy this hobby. Using simple materials, you can make earrings that are light, safe, and fashionable. Custom designs let anyone express their personality while keeping ears comfortable.
FAQs
Q1: Can I reuse decorations from old earrings?
Yes. Remove old glue carefully and reuse beads, charms, or stones.
Q2: How long does glue take to dry completely?
Most jewelry glues take 24 hours to fully cure.
Q3: Can I make earrings without clip bases?
Yes, but you need pierced-ear hooks instead. Clip bases are for non-pierced ears.
Q4: How do I prevent earrings from falling off?
Check clip tension and adjust with pliers. Lightweight decorations also help.
Q5: Can I make large or heavy earrings?
Yes, but make sure clips are strong. Heavy earrings may hurt ears after long wear.