Polymer clay earrings offer endless possibilities for self-expression and style. These lightweight, colorful accessories can reflect any personality, from bold and modern to delicate and minimalist. Crafting them at home allows full control over shapes, textures, and colors, making each pair completely unique.
The process requires just a few basic tools, simple techniques, and a bit of patience. Experimenting with patterns, marbling effects, or tiny charms can elevate ordinary clay into wearable art.
Beginners often find joy in mixing colors, cutting shapes, and learning how heat hardens the clay into durable, polished earrings. Handmade earrings make thoughtful gifts, standout fashion pieces, or even a starting point for a small business.
Exploring this craft encourages creativity, hones fine motor skills, and offers a satisfying sense of accomplishment once the first pair is ready to wear. Anyone can dive into polymer clay jewelry and enjoy the results instantly.
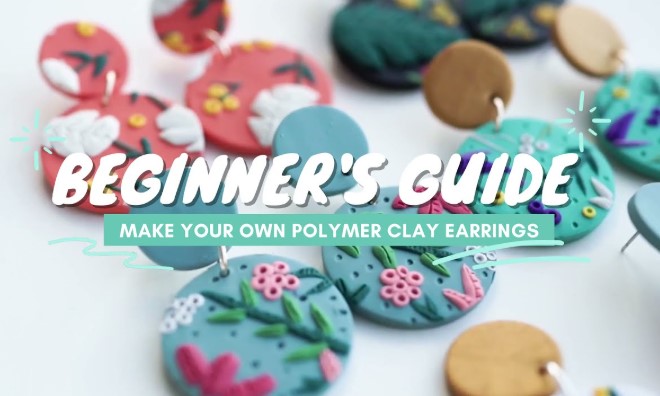
How to Make Polymer Clay Earrings?
Polymer clay earrings are popular because they are lightweight, colorful, and customizable. You can make earrings in any shape, color, or size. Handmade earrings can suit casual or formal wear. Making them at home does not need expensive tools or materials.
Polymer clay is versatile. It allows mixing colors, creating textures, and making tiny details. Each pair of earrings can be unique. This guide gives a full step-by-step approach for beginners and those who want to try advanced designs.
Materials You Will Need
Gathering materials before starting saves time and avoids mistakes.
Essential Materials
-
Polymer clay: Choose several colors. Brands like Fimo, Sculpey, or Premo work well.
-
Clay tools: A simple knife, toothpick, or rolling pin can shape and cut clay.
-
Earring findings: Hooks, posts, or studs.
-
Jump rings: Needed for dangling or multi-layer earrings.
-
Baking tools: Oven and baking sheet lined with parchment paper.
-
Finishing tools: Sandpaper or nail file for smooth edges, and optional gloss or clay sealant.
Optional Materials for Creativity
-
Stamps or texture sheets for patterns
-
Metal leaf, mica powder, or glitter for shine
-
Acrylic paint for painting after baking
-
Silicone molds for consistent shapes
Step-by-Step Guide to Make Polymer Clay Earrings
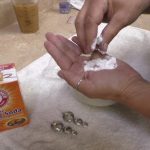
Step 1: Prepare Your Workspace
Use a clean, flat, non-stick surface such as wax paper or a ceramic tile. Wash your hands to remove oils. These steps prevent dust or dirt from sticking to the clay. Keep all tools within reach.
Step 2: Condition the Clay
Knead the clay with your hands until it becomes soft and pliable. Conditioning improves flexibility and prevents cracks during baking. Mix different clay colors for gradient or marbled effects. Roll, fold, or twist clay to combine colors.
Step 3: Shape Your Earrings
-
Roll the clay into balls, snakes, sheets, or flat discs.
-
Cut shapes using cookie cutters or a craft knife. Popular shapes include circles, hearts, teardrops, and geometric forms.
-
For more creative designs, layer clay sheets or shapes to make 3D effects.
Step 4: Add Texture and Design
-
Use a toothpick, needle, or clay tools to create patterns.
-
Press stamps, lace, or textured fabrics for intricate details.
-
Tiny details like lines, dots, or swirls make earrings look professional.
-
Mix colors by creating marble effects. Twist two or more colors gently before rolling.
Step 5: Make Holes for Hooks
-
Use a toothpick or needle to create holes.
-
Ensure holes are slightly larger than the hook or jump ring for easy attachment.
-
Check alignment so earrings hang evenly.
Step 6: Bake the Clay
-
Preheat oven according to clay instructions, usually 265–275°F (130°C).
-
Place earrings on parchment paper or a ceramic tile.
-
Bake for 15–30 minutes depending on thickness. Thin pieces need less time.
-
Avoid overbaking; it can darken colors or burn the clay.
Step 7: Cool and Smooth
-
Let baked earrings cool completely.
-
Use fine sandpaper or nail file to smooth edges or surfaces.
-
Buff lightly for a polished finish.
Step 8: Attach Hooks and Findings
-
Open jump rings using pliers.
-
Slide the earring through the ring and attach to a hook. Close the ring tightly.
-
For stud earrings, glue posts using strong jewelry adhesive.
-
Check that hooks and rings are secure to prevent earrings from falling.
Step 9: Optional Finishing
-
Apply gloss or clay sealant for shine and durability.
-
Use matte finish if you prefer a soft, natural look.
-
Wait until fully dry before wearing or packaging.
Advanced Tips for Better Earrings
-
Thin clay pieces bake more evenly and stay lightweight.
-
Keep unused clay in airtight containers to prevent drying.
-
Experiment with color mixing, marbling, and textures for unique results.
-
Use silicone molds for perfect repeatable shapes.
-
Add metallic powders or mica before baking for sparkle.
-
Combine polymer clay with beads, charms, or resin for mixed-material designs.
Troubleshooting Common Issues
-
Cracks during baking: Condition clay better and roll evenly. Avoid thick pieces.
-
Colors fading: Bake at the right temperature. Overbaking dulls colors.
-
Holes closing up: Make holes slightly larger than needed and check before baking.
-
Clay sticking to tools: Use cornstarch or a non-stick surface.
Conclusion
Polymer clay earrings allow creativity and personal style. Handmade earrings can be small and simple or bold and detailed. With patience, proper tools, and techniques, anyone can make beautiful earrings. Unique designs come from experimenting with colors, shapes, and textures. These earrings make great gifts, personal accessories, or even products for small businesses.
FAQs
1. How long does polymer clay take to bake?
Baking takes 15–30 minutes depending on thickness. Follow the clay brand instructions.
2. Can I reuse leftover clay?
Yes. Keep it in an airtight container to stay soft and usable.
3. How can I make earrings lightweight?
Roll clay thin and avoid thick layers. Use small shapes for comfort.
4. Can I combine different brands of clay?
Yes, but check that the baking temperatures are compatible.
5. How to prevent earrings from breaking?
Thin edges and careful handling help. Avoid excessive bending after baking.